ISAPI
Internet Information Services
|
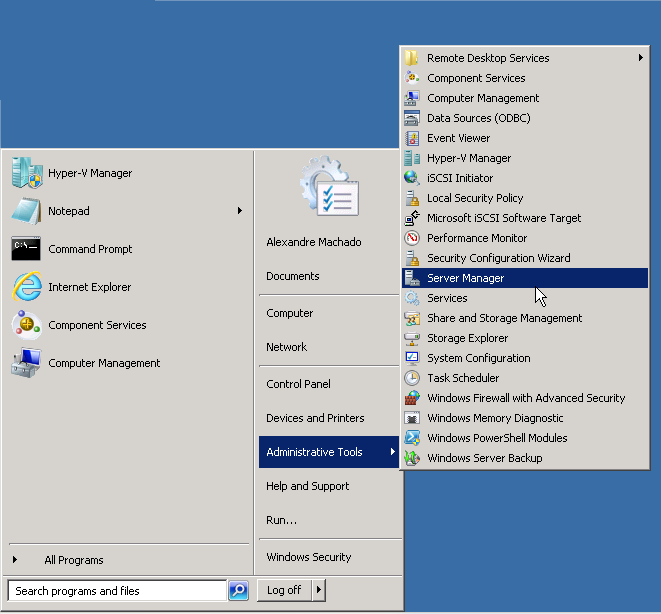
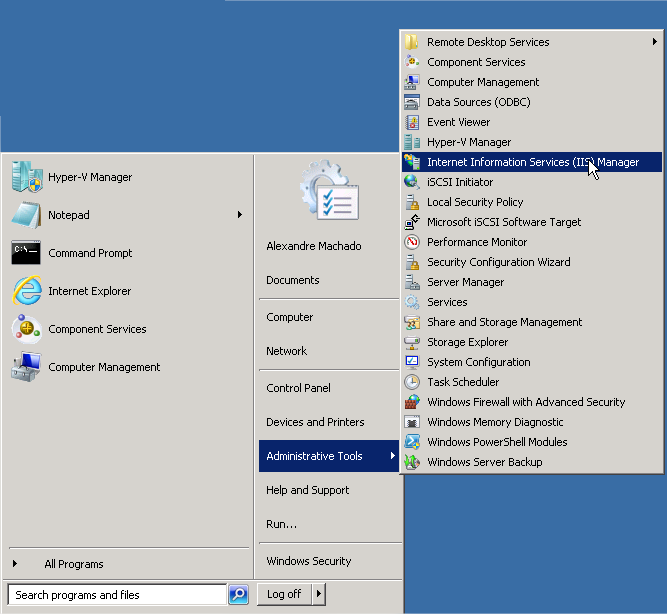
1. Pre-requisites1.1. Internet Information Services (IIS) 2. Installing the pre-requisites on your Windows ServerWhen you install a Windows Server t usually does NOT install IIS and web server support. To install all web server support, go to Control Panel -> Administrative Tools -> Server Manager:
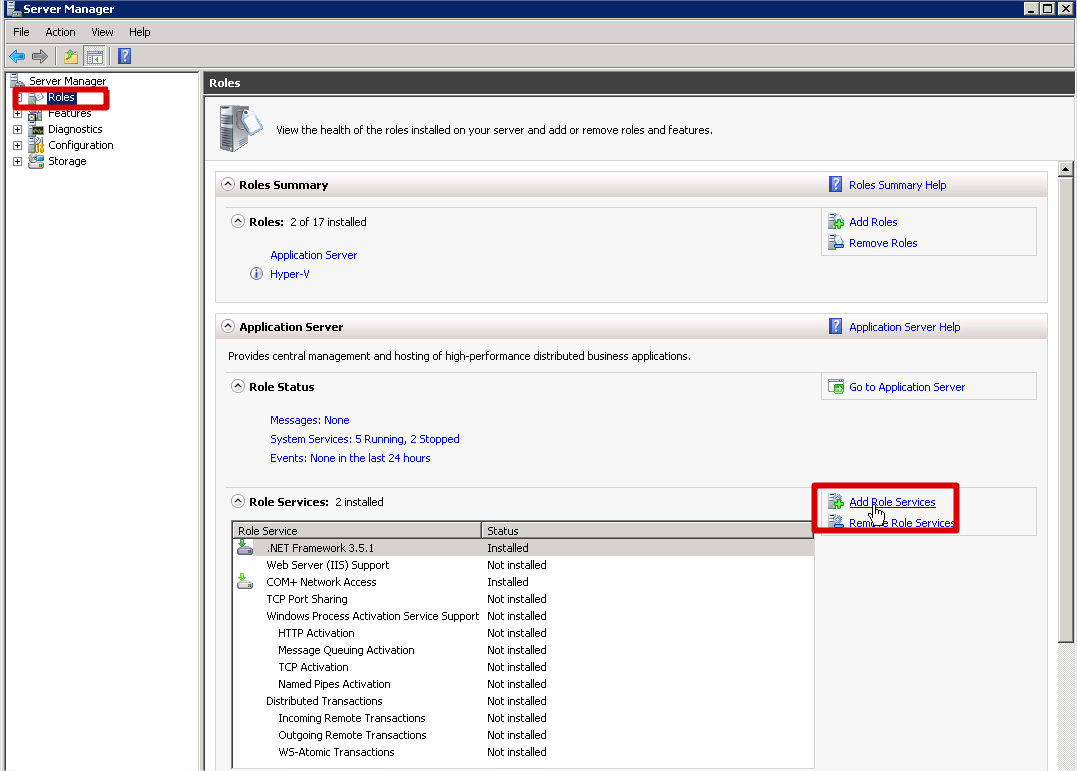
Select Roles and then Add Role Services:
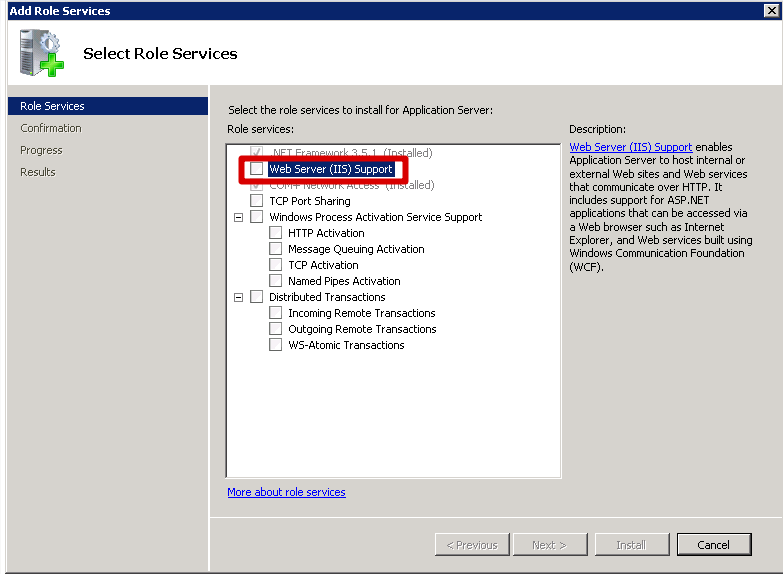
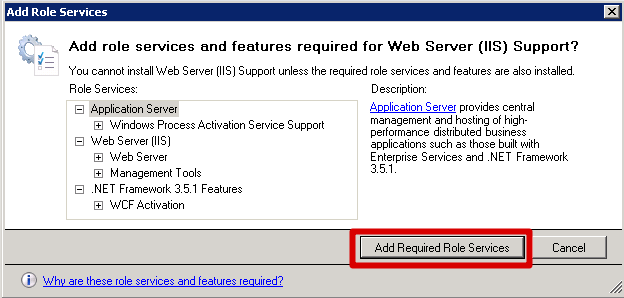
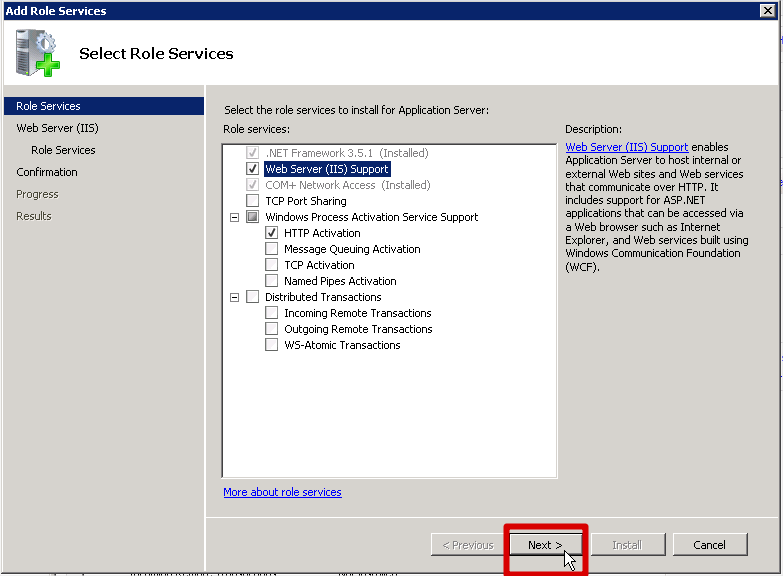
A new window will open asking you to add additional role services required for Web Server support. Choose Add Required Role Services:
Click on Next button:
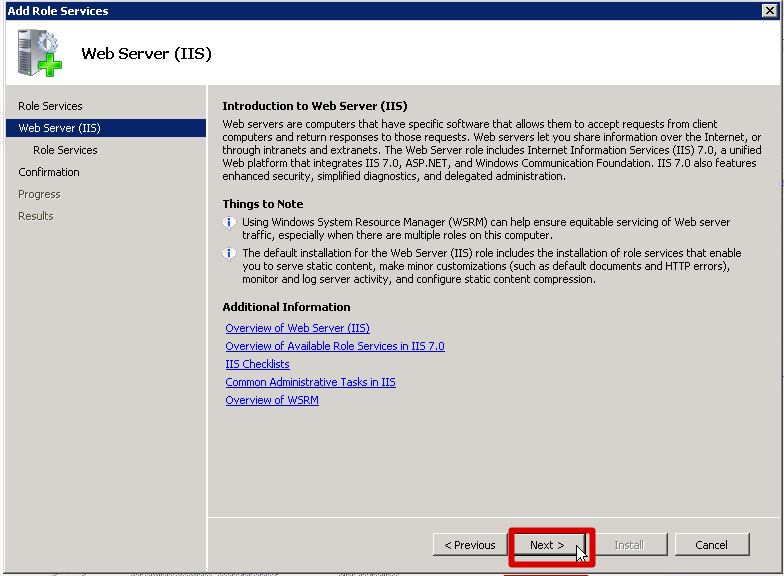
Click on Next button again:
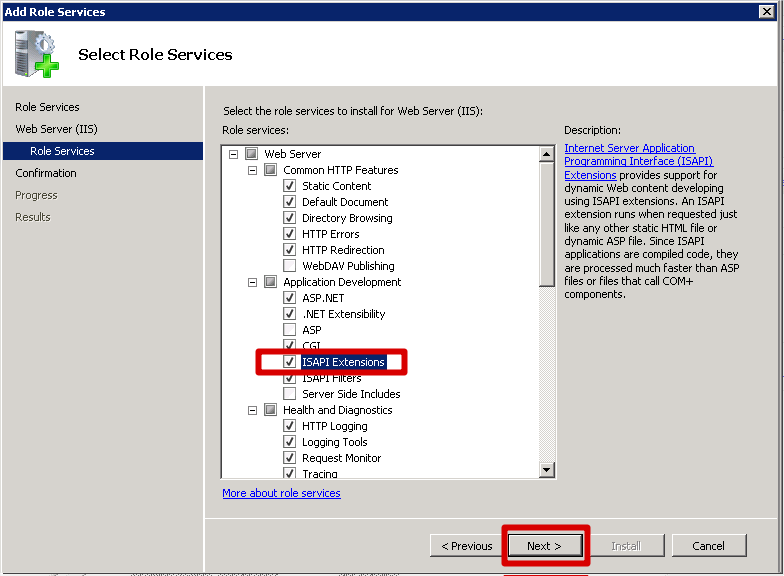
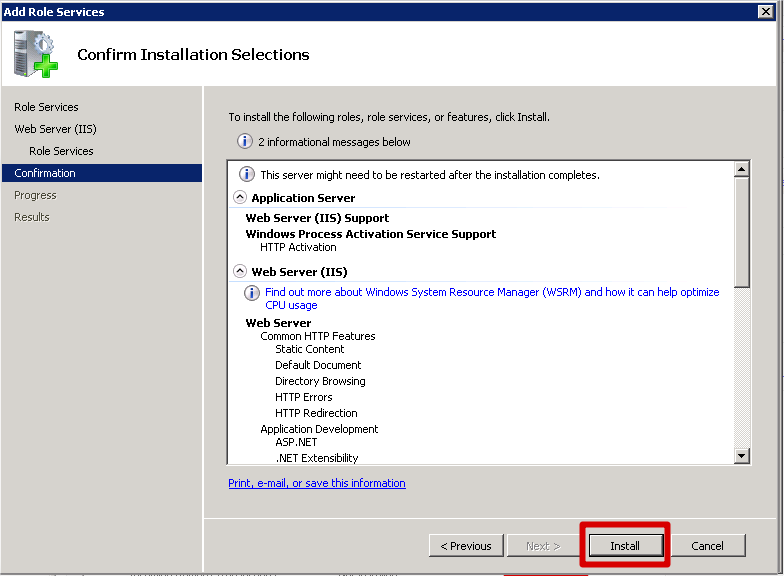
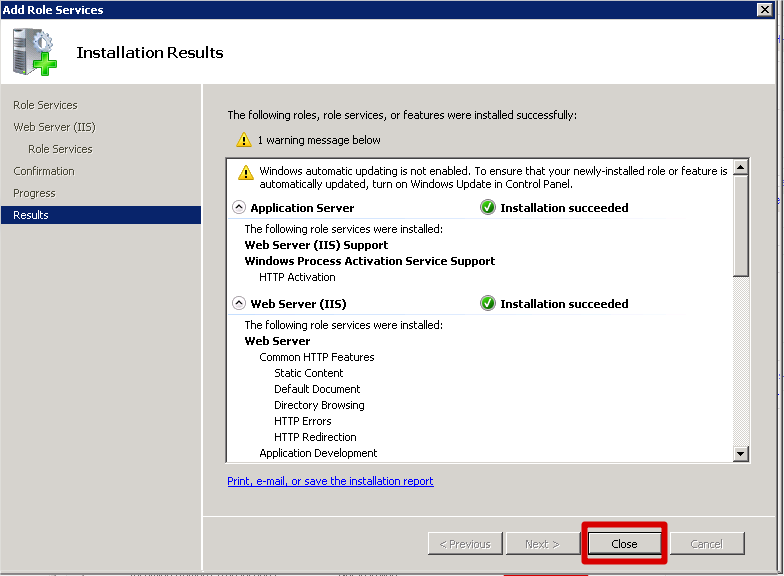
Select all the services you want to install. Please note that you MUST check ISAPI Extensions. It is also a good idea to install ISAPI Filters, CGI and ASP.NET, unless you are sure that you won't install any other web application in this server.
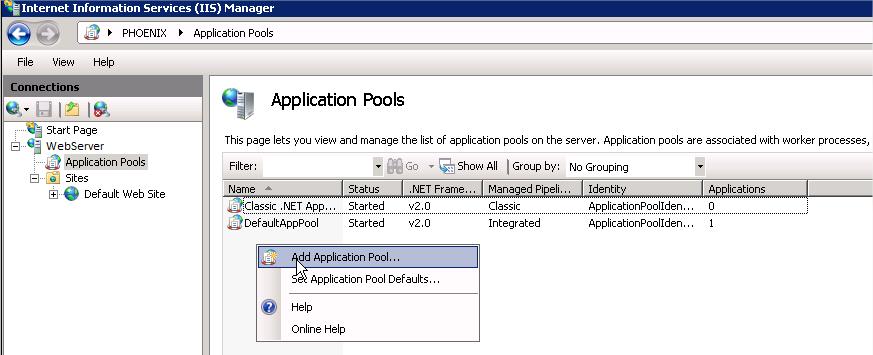
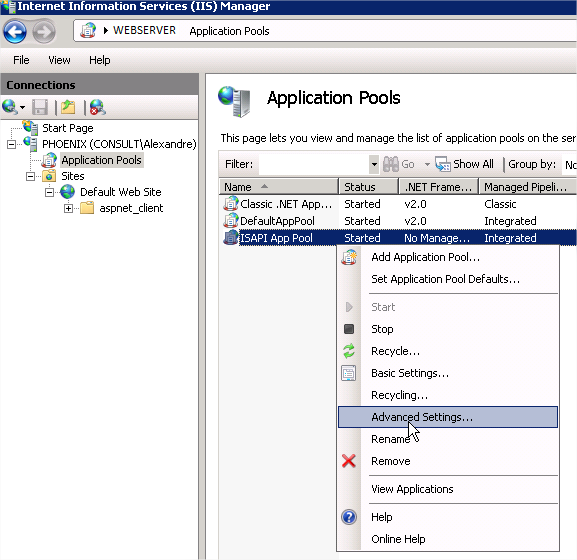
3. Creating an Application Pool for your ISAPI ApplicationOnce you have all the pre-requisites installed, it is time to install the ISAPI application. We start creating a new application pool for the ISAPI application. It is a good idea to create one application pool per application. Doing this, you can stop/update/start an ISAPI application without interfering with other installed applications. Below the tree root, select Application Pools and then Add Application Pool:
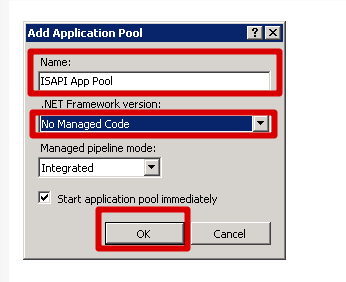
Give a name for your application pool (in our case ISAPI App Pool), select No Managed Code and click on OK button:
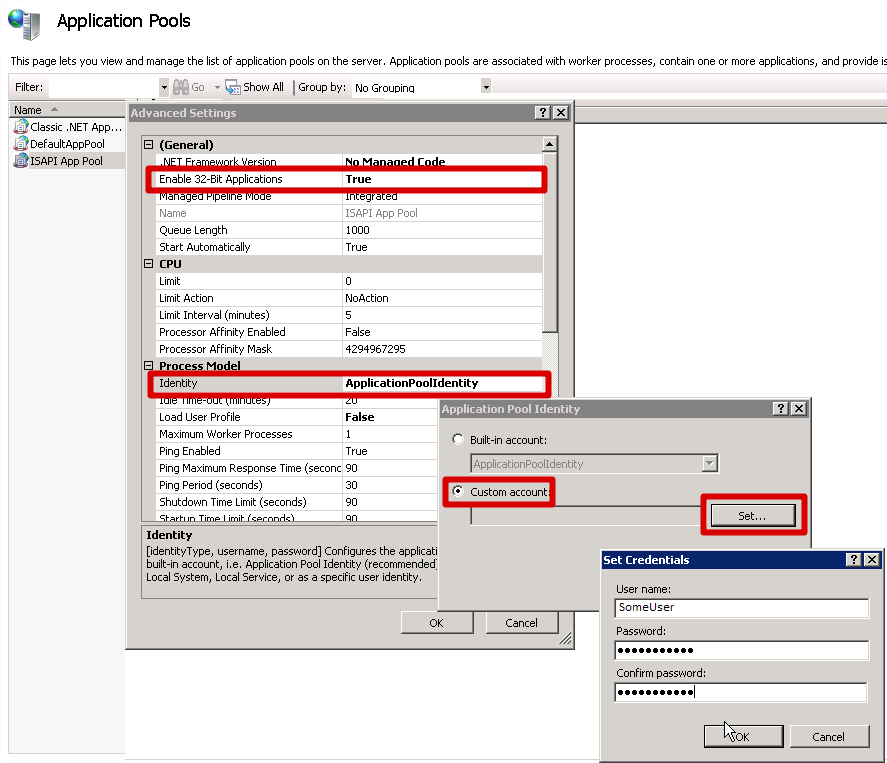
In order to support 32-bit application on 64-bit Windows you must set Enable 32-bit Applications to True. Also, select the Identity of your application pool and set it to a custom account. Personally, I always create a new user for the application pool and give it all the required priviledges. If your your application requires access to other protected network resources (like other application servers, database servers, etc.) you should consider using a domain user with all the necessary priviledges. If you have full control over this web server, it is easier if you add the user to the Local Administrators group. This way, security restrictions won't affect the process. Once the application is running, you can remove the user from Local Administrators group and give it only the requires permissions.
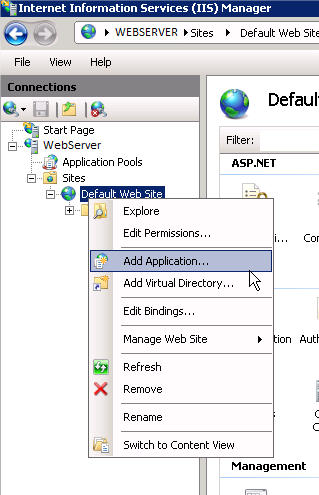
4. Creating a new application in IISNow that we have a new application pool for our new ISAPI application, is time to create the application under IIS. Right click the Default Web Site (you may also create it under a differente web site) and choose Add Application:
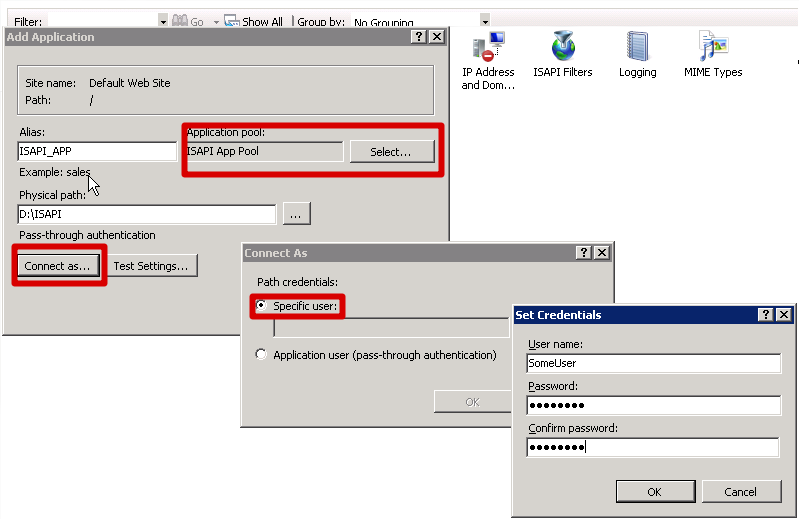
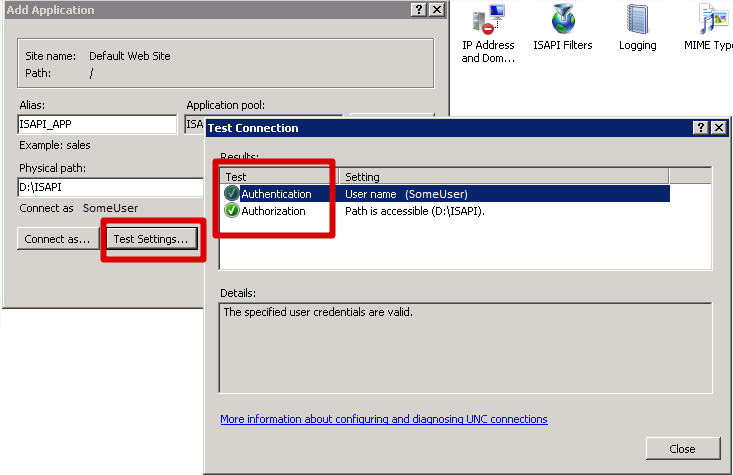
Once the user is set, click no the button "Test Settings...". It must succeed. If not, check the NTFS permissions of the user on the physical path selected.
5. Enabling ISAPI Modules in IISEven though you installed ISAPI support, it is disabled by default. You have to enable ISAPI on IIS before testing your application. Select your newly created application and then double-click on the "Handler Mappings" icon:
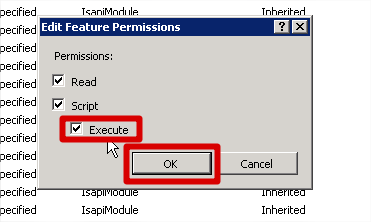
Note that CGI-exe and ISAPI-dll are disabled. To enable them, click on the link "Edit Feature Permissions...":
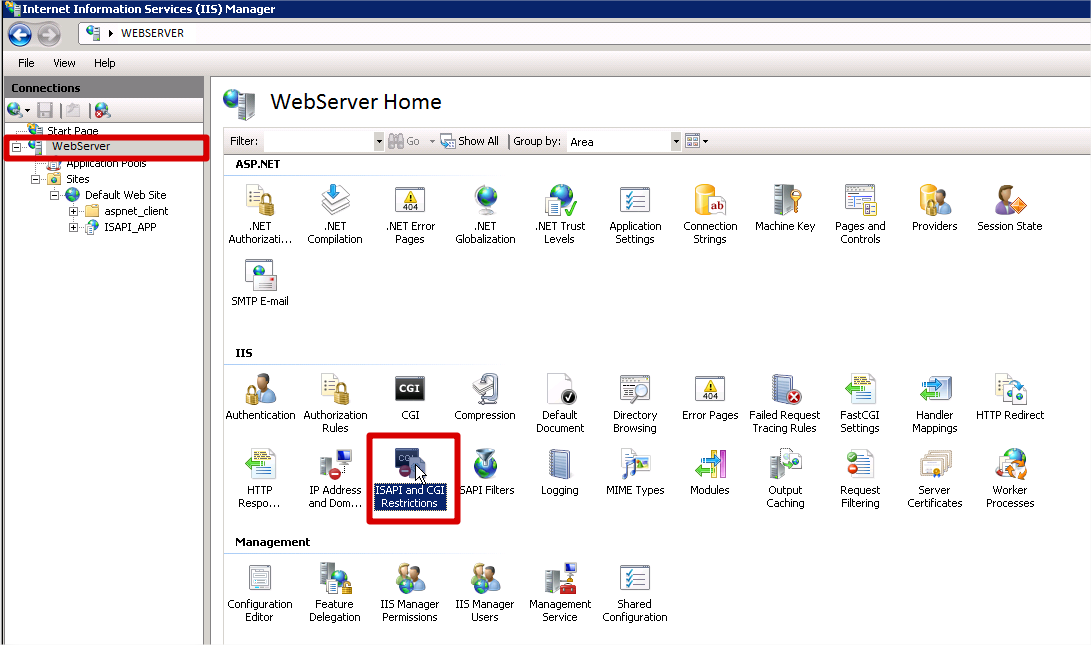
A final step to enable ISAPI on this web server is remove the ISAPI and CGI restrictions. Select the root node and double-click on the "ISAPI and CGI Restrictions" icon:
Click on the link "Edit Feature Settings...":
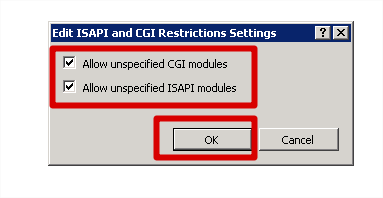
Mark both check boxes and click on OK button:
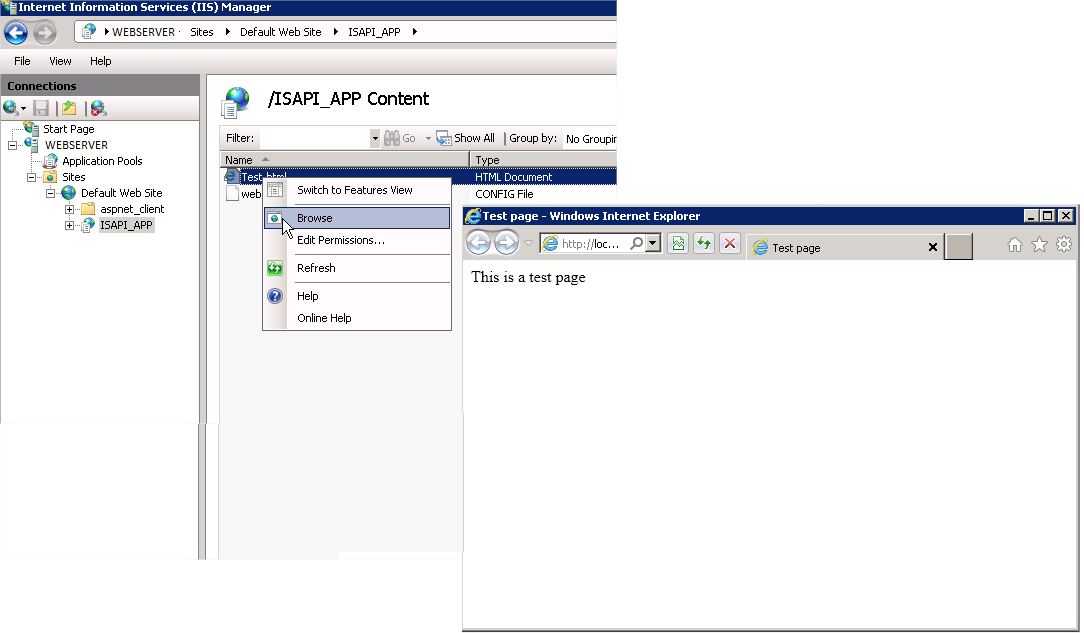
6. Basic testThis basic test is not required, but it's better test the setup of your web application with a simple HTML file before trying to deploy your real application. Don't expect your ISAPI application to work properly if IIS can't serve a simple HTML file. Create a simple HTML file (see the example) using notepad and save it in your application folder. <!DOCTYPE html> Inside IIS Manager, switch to "Content View", right-click your test.html file and select "Browse". This basic test must be successful. If not, check the user credentials in NTFS and also if WWW service is running.
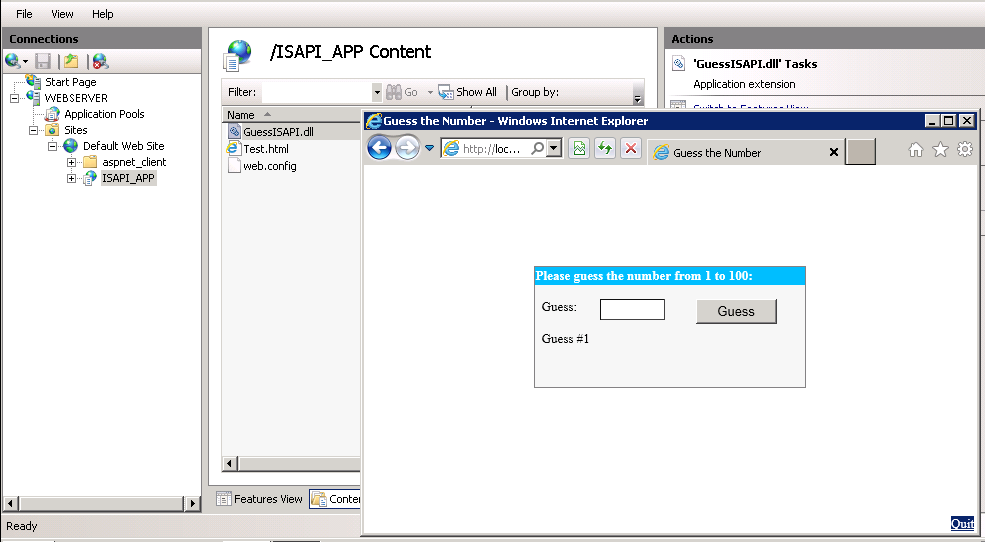
7. Testing your ISAPI applicationCopy all files required by your ISAPI application to the application folder. Remember to copy wwwroot folder and its files to the server. Once the ISAPI files are in place, repeat the test but now using your ISAPI DLL.
8. Configuring your application to show timeout errors in a Windows ServerWhen deploying ISAPI applications in Windows servers and a time-out error occurs, you will probably get an error page like this: 500 - Internal server error. This happens because IIS replaces any content with HTTP status code greater than 400 with its own content (a useless error message, by the way). When the timeout error occurs, IntraWeb responds with an error code 500. There is no easy way - if any - to programmatically change this behavior from within an ISAPI extension. You need to create (or edit) a web.config file for your application, like the one shown below: <?xml version="1.0" encoding="UTF-8"?> More specifically, you need to add this line: <httpErrors existingResponse="PassThrough" /> to the system.webServer section of the file, if you already have a web.config file for your application.
Then save this file in the same folder where your ISAPI DLL is located and restart the application pool or the web server, and you are done. You can read more information about this setting here: http://blogs.iis.net/ksingla/archive/2008/02/18/what-to-expect-from-iis7-custom-error-module.aspx |
